
How to Remove Reverb from Voice Recordings: A Practical Guide to De-Reverb Plugins
You nailed the take. The delivery is right, the words are right, and then you hear it on headphones: the room. A hollow, boxy echo trailing every phrase, the kind that makes a podcast sound like it was recorded in a stairwell and a voice-over sound like a phone call. Reverb is the most common problem in home and on-location voice recording, and for years the honest answer was "re-record it somewhere better." That's no longer the only answer.
This guide covers what reverb actually does to a voice, why it's so much harder to remove than noise, the tools engineers use to deal with it, and how to choose and use a de-reverb plugin without wrecking the recording.
What reverb does to a voice
When you speak in a room, the microphone hears your voice three ways. First comes the direct sound, straight from your mouth. A few milliseconds later come the early reflections, the first bounces off the desk, the nearest wall and the ceiling. Then comes the late reverberation: thousands of reflections piling up into a smooth tail that fades away.
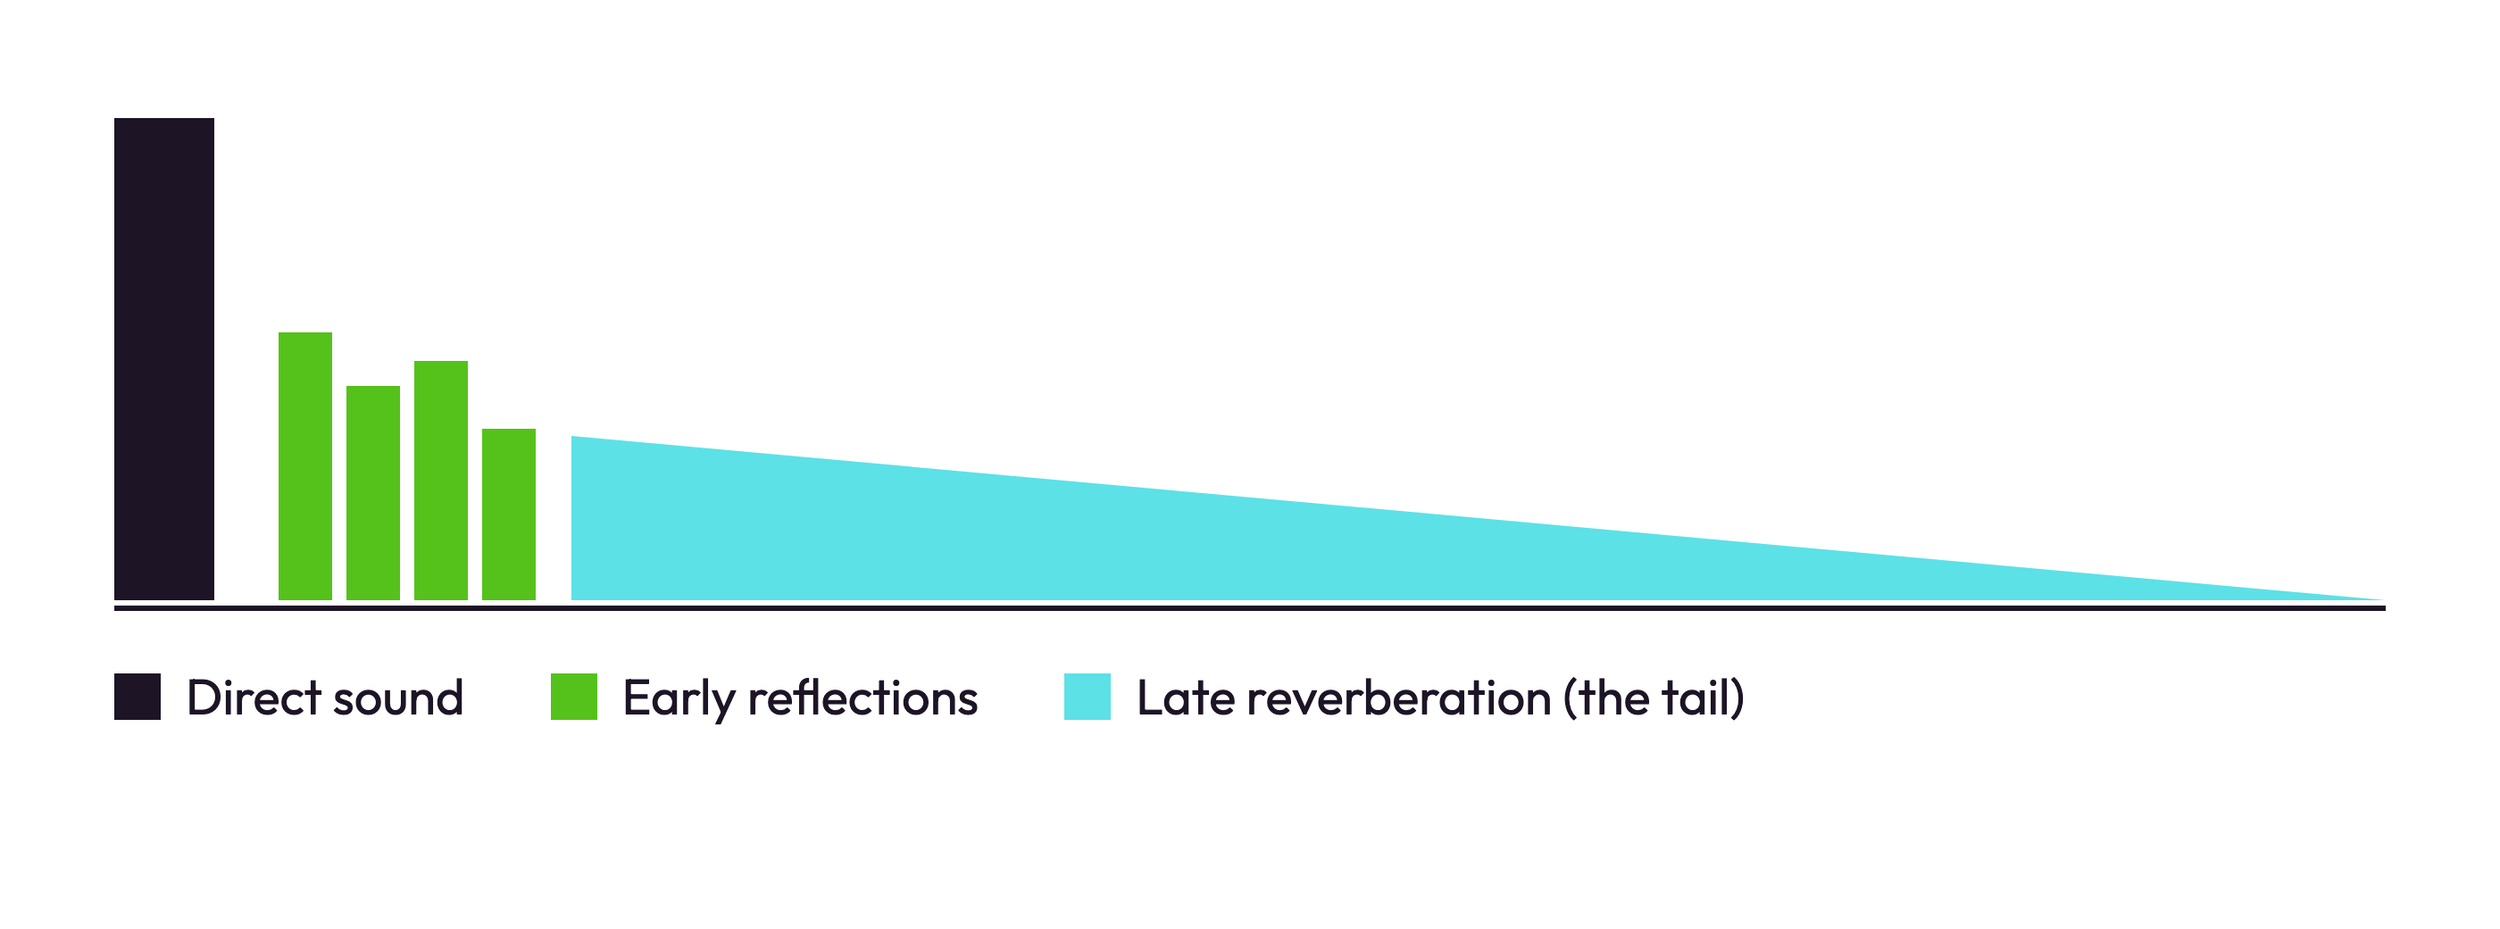
What a microphone hears after one short word in an untreated room, over time.
Early reflections color the tone; they're the "boxy" or "hollow" quality. The tail is the audible echo, and how long it lasts depends on the room: a small carpeted bedroom might let it die in a few tenths of a second, a kitchen or a stairwell much longer. Music producers add these on purpose (we covered the classic types in What Are the Different Types of Reverb?). On spoken voice, the room you happened to record in is almost never the one you'd choose.
Why reverb is harder to remove than noise
Background noise, like a fan, traffic or a computer, is a separate sound sitting underneath your voice. It's there whether you talk or not, which makes it relatively easy to measure and pull down.
Reverb isn't a separate sound. It's your own voice, delayed and smeared, and it lands on top of the next syllable you say. It has the same pitch, the same timbre and the same spectrum as the words you want to keep. A processor has to work out, moment by moment, which part of the signal is the voice arriving now and which part is the voice from half a second ago bouncing back.
The traditional toolkit
1. Fix it at the source
Nothing beats less room in the first place. Get the microphone closer: halving the distance to your mouth raises the direct sound against the room. Use a directional mic and point its dead side at the most reflective surface. Soft furnishings, a rug, a bookcase or a closet full of clothes all absorb reflections. Even a duvet hung behind the microphone helps.
2. Gates and expanders
A gate or downward expander turns the signal down when you stop talking, so the tail disappears in the pauses. It's quick and transparent when set gently, but it does nothing to the reverb that sits under your words, and set too hard it chops off word endings and breaths.
3. EQ
A cut in the low mids (often somewhere between 200 and 500 Hz) can reduce boxiness from early reflections. It makes a reverberant voice sound less muddy, but it can't separate the echo from the voice, because both live in the same frequencies.
4. Spectral de-reverb processors
Dedicated de-reverb tools estimate how the room's sound decays and subtract a prediction of the tail, frequency band by frequency band. They can work well, but pushed hard they tend to leave a thin, watery or "underwater" sound, and many are designed for offline editing rather than live use.
How AI de-reverb works
The newest approach uses a neural network trained on large amounts of speech: the same voices recorded clean and recorded in many different rooms, with many different kinds of noise. From those examples the network learns what a dry voice looks like and how rooms distort it. When you play it a reverberant recording, it estimates, every few milliseconds, what the clean voice would have been.
Because it has learned what speech sounds like rather than following a fixed rule, a good model can remove reverb under the words as well as between them, and can deal with noise and reverb in the same pass. The trade-offs are real, though. Models need CPU power and introduce some latency. They're trained for a particular kind of material, usually speech. And, like any processor, they can create artifacts when you ask for more than the recording can give.
How to choose a de-reverb plugin
Real time or offline? If you want it on calls, streams or while tracking, it has to run live. For post-production only, an offline tool may be enough.
Latency, and whether it's reported. Every de-reverb process adds delay. In a DAW, the plugin should report its latency so the host can keep tracks in sync.
What it's built for. Speech, singing and full mixes are different problems. Use a tool designed for the material you have.
A mix or amount control. You'll rarely want 100% removal. A clean wet/dry blend that stays time-aligned is essential.
Artifacts on the hard parts. Test it on sibilants, breaths, laughs and soft word endings, not just loud phrases.
Honest metering. Being able to see what was removed makes it far easier to judge how far to push.
Where the processing happens. Some services upload your audio to the cloud. A plugin that runs locally keeps unreleased material on your machine.
Formats and platform. AAX for Pro Tools, VST3 and AU for most other hosts, and check the operating system and processor it supports.
Getting the most out of de-reverb
Put it first. De-reverb belongs at the start of the vocal chain. A compressor before it raises the room tail and gives the processor a harder job.
Match the setting to the mic distance. A close podcast mic and a lectern mic across a hall need different treatment.
Leave a little room. A trace of natural ambience often sounds more real than a completely dry voice. Back the mix off until it stops sounding processed.
Judge on headphones. Small amounts of tail and artifacts are much easier to hear on headphones than on laptop speakers.
Bypass often. Toggle between the original and the processed voice at matched level. Your ears adjust quickly to both.
Be consistent across a scene. In dialogue editing, process every clip of a speaker the same way so the sound doesn't jump between cuts.
Where Clean Take fits
We built Clean Take for exactly this problem. It's a real-time noise and reverb remover for spoken voice that runs entirely on your Mac. It comes as a standalone app for calls and streams and as an AAX, VST3 and AU plugin. Four models cover close mics, distant mics and everything between, and Voice Lock learns your voice from about thirty seconds of speech. The monitor shows exactly how much floor and tail came out, and the plugin reports its latency to the host.
FAQ
Can you completely remove reverb from a recording?
Often you can remove most of it, but how much depends on how much direct sound survived. A voice two meters from the mic in a tiled room has less to work with than one recorded close. Aim for "natural and clear," not "zero room."
Is de-reverb the same as noise reduction?
No. Noise reduction removes sounds that are separate from the voice; de-reverb removes the voice's own reflections. Some tools, including Clean Take, handle both together.
Can I remove room echo live, on Zoom or a stream?
Yes, with a tool that runs in real-time and can act as a virtual microphone for other apps. Expect a small amount of added delay, and use headphones so the speakers don't feed back into the mic.
Will a speech de-reverb plugin work on singing?
Tools trained on speech are tuned for speech. Results on sung or musical material vary, so test on your own recordings before relying on them.
